PhotobucketPhotobucketPhotobucketPhotobucket

Tuesday, November 13, 2012

A Blast From the Past


I love restoring old things so they don't end up in dumpster somewhere.  But when I found this old radio I thought I hit the jackpot for my hubby.  He loves old radio's and juke boxes, really anything thats old and is associated with music.  I loved the look of the cabinet and was hoping that he would be able to restore the electrical part of this radio/record player.


Wires were hanging out every where and most of them looked like they had been chewed into by... something?  When Doug looked at it he tried several things in hopes of being able to restore it but it was really broken.  There were tubes broken and pieces missing, not to mention the scary wiring again. 


The speaker was completely blown and the record player wasn't any better off.  The poor thing had seen much happier times, I'm sure.  We hated to do it, but we decided to gut it or it would end up in a dumpster somewhere.  At least we could save the cabinet.  Doug did save all of the radio and record player parts, he just couldn't throw out something so cool. 


So the reconstruction started, and what a job it was.  Doug helped me on most of this part, which I was very thankful for.  I could have done it but he is so fast at it, maybe because he is a contractor!


Here I have already sanded and stained the top, which the wood on the top was beautiful.  I sprayed a primer on the rest and am ready to paint, but what color should it be? 

 
It was kind of boxy looking so we decided to take the jig saw to the bottom of it.  Doug gave it a great new style on the bottom.  Notice the picture above and the after picture below.
The inside became a cabinet with a lot of nice shelves.  I then painted it Graycon, one of my favorite colors.  It's kind of a aqua/green, but really pretty.


The outside I finished in Swiss Coffee. The stain color for the top is dark walnut, and then I used about four coats of rub on poly to seal the top and one coat to seal the rest of the piece.


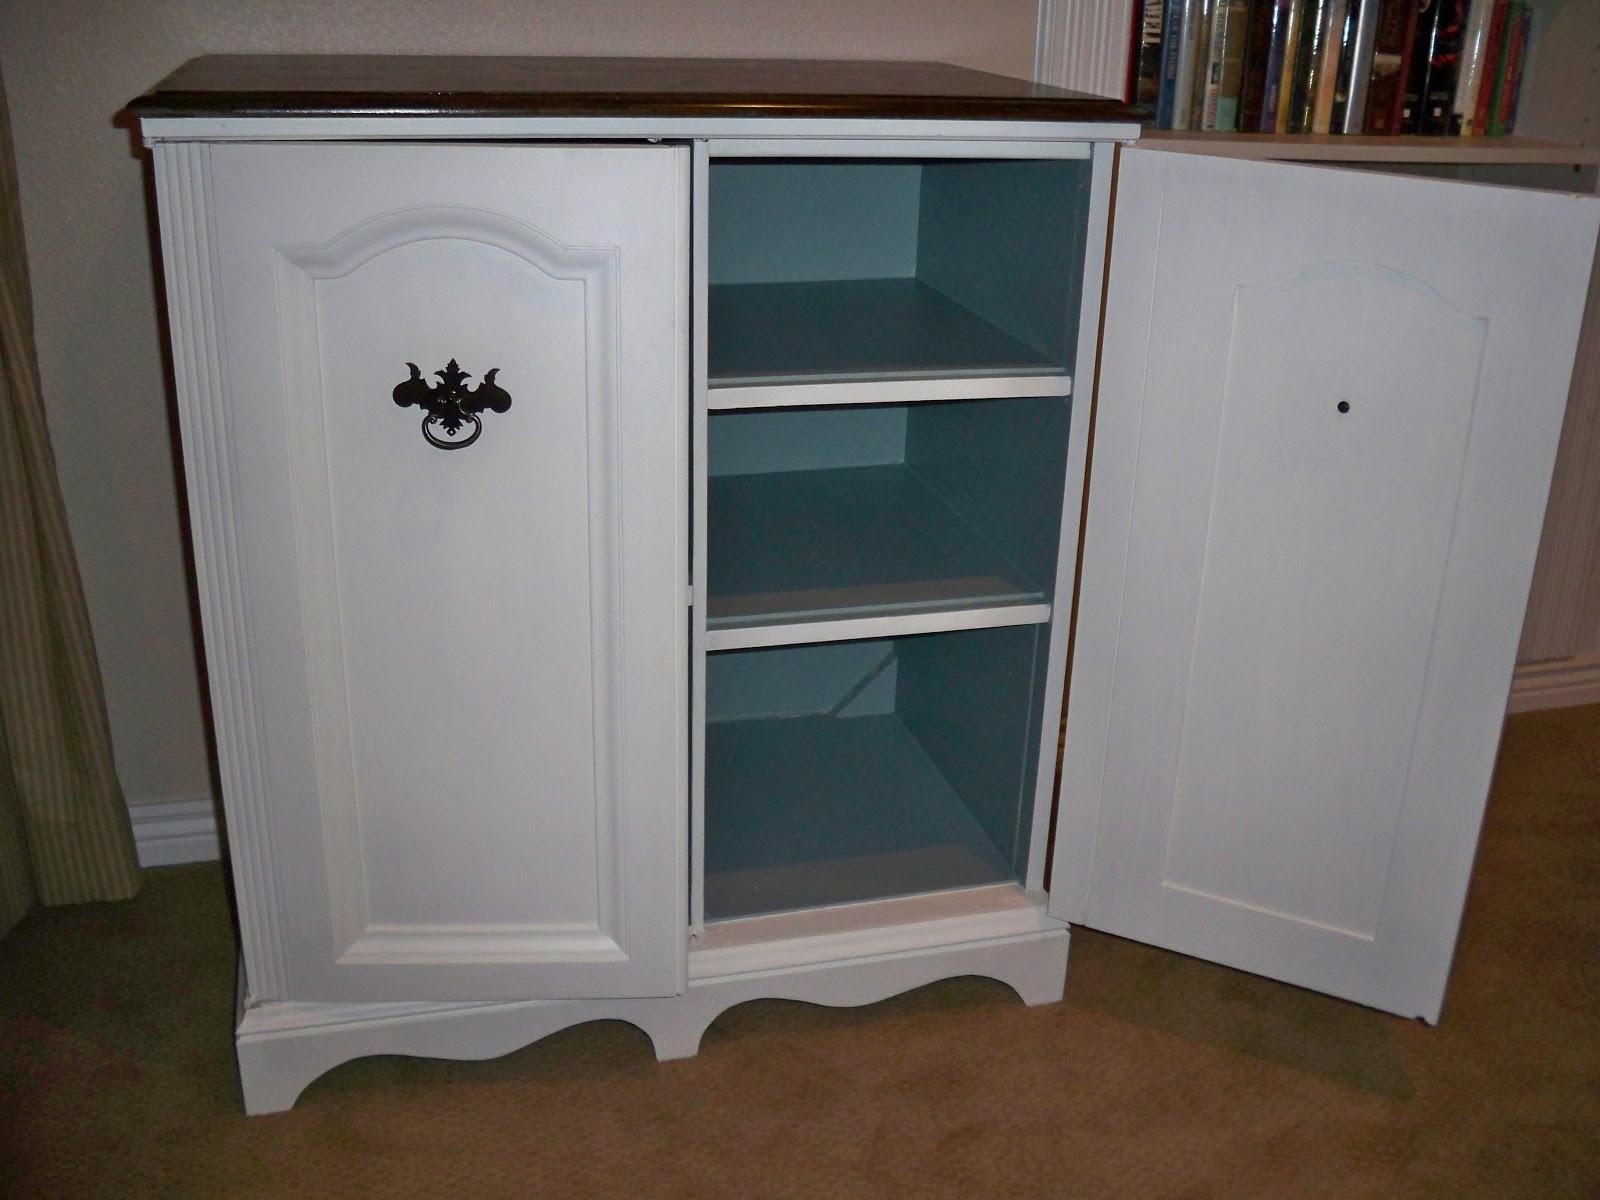
Ta Daaaaa!  I loved being able to at least save the beautiful cabinet.  It would have met up with the dumpster soon in the condition it was in.  The aqua/green is such an inviting color and adds so much charm to this old piece.  Now it has a whole new purpose and will be used for years to come.


Thanks for stopping by, I love your comments and new follower's as well.

Retro Meet Shabby

My daughter spotted this dresser and another one at a yard sale and grabbed them for me.  Both of them are retro style, which isn't my favorite style but I thought I would try something new.  The first dresser I painted took forever to sell so I decided to change the retro look of this one a little bit.  I had the hubby attach some moulding around the top edges to take away the sharp rectangular boxy  look.  I wanted to soften the top up a bit and adding the molding did the trick.


Cleaning the dresser up and sanding it was the first time I really took a good look at it.  The drawers all worked great, and the inside of them were so clean.  I've had a really long run of dressers that the drawers are messed up and many of them are so filthy, so this was a nice change.  The curves on the bottom drawers were so cool, it gave it a really unique look. The handles were pretty neat looking too so I definitely wanted to reuse them.


                               I scuffed up the Formica top and painted it with ASCP in Graphite.


  The body I painted in Swiss coffee and distressed lightly.  Doesn't it look like a completely different dresser?


Thanks so much for stopping by, I love your comments and new followers as well.
Sandi


Tuesday, September 4, 2012

Bowed and Beautiful


What a deal I made on this bowed front dresser.  I found it on Craigs list and when I went to look at it I knew I wanted it no questions asked.  But the lady selling it apologized for the third drawer not working right.  I tried to push it in at her place and I couldn't get it in all the way either, so what, it's still great!!


When I got the dresser in my shop and had time to look it over more closely I discovered that the lady had her third and fourth drawers mixed up and that was the only reason it wouldn't go in all the way.  I almost felt guilty about getting it for such a good price.  It did have a lot of work to do on it though so that guilt lasted just a minute.  The drawers all needed glued and nailed back together.  You could see light through some of the big gaps between the back of the drawer and the bottom of the drawer. 


I used wood filler in a lot of different places on the top so I wasn't able to stain it like I wanted to.  But I think it still turned out beautiful.  I painted it Swiss Coffee after having to use an oil based primer due to an old red stain.  After painting I distressed it lightly and then used poly all over it.  I spray painted the hardware with oil rubbed bronze to up date the look of the gorgeous pulls. 


The white color fitted this piece so well, kind of elegant, don't you think?


                I love, and try to save all the old hardware that I can, especially when it's this pretty.


I loved how this turned out, but then I love almost all old pieces.

Thanks for stopping by, I love your comments and new followers as well.
Sandi

Wednesday, August 29, 2012

Red and Shiney

I love Craigslist, it's where I find 95% of all my furniture, including this one.
 

So the high gloss needs to go (I'm thinking something a little warmer) as well as all those paint runs.  There are several places on the skirt that are broken so I will be gluing and clamping today.  The top is in rough condition so it definitely can't be stained.  There are places that look like something really hot was left on it because it's bubbled and has lifted.  I will be sanding a lot inside the drawers and on the side's of the drawers because there is red spray paint all over the place. 


I'm working on about four dressers right now but you can see the red paint on the back of the small drawer.  The other drawer that looks red belongs to another dresser and I will have to use an oil base primer on that one, bummer.


So I finally got all the red paint concealed and the hole's  patched.  I painted her in Sherwin Williams graycon green, which is one of my favorite colors.  I used a Val spar glaze on it and then finished with Min Wax rub on poly.    The color is darker then the picture so I tried some indoor and out door pictures. 


 I have lined drawers with fabric and scrapbook paper before and liked them both.  I was at the dollar store the other day and found this contact paper that guaranteed it was removable, which is a big concern of mine, but yet stayed in place.I had to try it because it really is much easier then the other two options.  I have to say it worked really good and was so fast and easy.  I pulled it up and
resituated it more then once and it still stuck when I was done with it.  The down side was that the dollar store had two pattern's in stock so if you see any and like it, grab it.


The last photo is truest to it's real color (I need a new camera), it's a color that would go with about anything.


Thanks for stopping by, I love your comments and follower's as well.

Sandi

I Got Nothing

My daughter found this dresser for me at a yard sale.  Isn't it nice to have family and friends who help you out when they see furniture at yard sales or thrift store's?  I consider this a retro style and since I haven't refiinished this style before I'm kind of at a loss for what to do with it.  As you can see it's pretty banged up so I got out the nail gun, wood glue, wood filler and went to work, (that make's a lot of hard work sound so simple doesn't it?). 


On one side the bottom was peeling pretty bad.  I took a razor knife and straight edge and scored all the way across the dresser so I would have a nice clean edge when I lifted the laminate.

Now I had a single edge to wood fill instead of all those jagged one's.


I applied a good amount of wood filler and then glued the bottom boards together.   

I decided to paint it a creamy yellow color and spray paint the original handles silver.  The cream color looked too plain by it's self so I added some paris gray to it.

I love the handles on this piece, so very retro!


The picture doesn't do it justice, or maybe it does.  I can't qute get used to the boxiness of this style.  So this is my second paint job, tomorrow I will be trying a different one to see if I like it better.  Any idea's for me, they are more then welcome.


Okay, I just didn't like it!!!  I had to redo it again, I know, I know, what can I say?
I painted it all the same color and the top is ASCP graphite.  I then used Rustoleum oil rubbed bronze to redo the handle's.  I really didn't like them spray painted silver even though that was their original color.  I also put a little bit bigger handle's on the top drawer.  I like it better, infact it's kinda a cute....finally.


Thanks so much for stopping by.

Monday, July 30, 2012

I Love My POC

Have you ever bought a dresser and then thought to yourself, "what was I thinking", oh, I always do. And so because of this my husband thinks I have a soft heart for the unloved furniture that most people would either throw in the dumpster or burn, thus, the unloved furniture syndrome. As soon as I loaded this piece in my SUV, it started to fall apart, really that fast.  But I loved the hardware on it and. I'm a sucker for great hardware. I really do have a soft spot for the unloved furniture. You know, it's kind of a challenge.


The main thing that's holding this dresser together is the wood filler.  One drawer completely fell apart, and the rest of them had to be reglued and nailed, and one simply had to be made new from scratch.  I sanded until my fingers were sore, but the more I worked on it the more excited I was to see how it would turn out.


So my husband made a whole new drawer and we only used the old front of it because the rest was so warped, broken, and just falling apart.  Now, let me tell you how we referred to this piece of furniture.  POC, Piece of Crap.  I didn't give it that name, but Doug did as soon as he saw it, and so the name stuck until we were done.


I knew I wanted to paint it a color similar to ASCP Duck Egg Blue, so I went over to Altard's blog and Mandi has compared Behr and Sherwin Williams paints to Annie's paint colors. She has saved us all so much work, thanks Mandi.  This is S.W. Halcyon Green and is beautiful.  I lightly distressed and glazed with Valspar glaze.


The old mirror was missing so, hubby replicated the skirt on the bottm of the dresser for a accent trim to take the mirror's place. It took away the emptiness on the top and made it look more complete


This one is one of my favorite redo's of all time, I don't know why, but I sure like how it turned out.  The dresser is completely functional now and will brighten any one's home.

Thanks for stopping by, I love your comments and
new follower's as well.


Beautiful Highboy

So my kids were split on this one, half of them liked the back splash and half thought it looked out of place.  So I refinished it and decided to give the new owner the choice if they wanted it on or not.  This dresser is one of the heaviest pieces of furniture that I've worked on.  It looks really sound and like there's not much work to do here, but I discovered that all the drawer guides were broken. 

As you can see one knob is missing and the latch to one of the handles is gone.  I took them to an antique restoration guy and he not only had close matches but he also fixed the handle for me on the spot.  He has the greatest workshop, I hope some time to feature his place.


I was really bad about taking pictures during the prep work.  I recruited my hubby and he made new drawer guides for four of the five drawers.  I had tried to use the plastic drawer guides that you staple on the back of the drawer, but none fit quite right, and besides,that would be too easy, 
 right?


I used S.W. antique white and made my homemade chalk paint with it for the base.  For the drawers I used S.W. intellectual Grey.  I love Sherwin Williams sample's.  They were having a sale last week and so for $4.50 I got a quart of paint in satin.  You can't beat that with a stick!!  So I stocked up on a bunch of great colors that I've been wanting to try.


I lightly sanded it then finished it off with Min Wax rub on poly.  I always use a poly finish when I paint furniture with latex.  It seals it so much better and also prevents the drawers from sticking to the base if you let it cure properly.


The back splash didn't look like it came with the piece originally but when looking more closely I think it really did. It will be fun to see which way the customer goes on it.


I love how it turned out, I could easily put this in my home and have it fit right in.

Thanks so much for stopping by, I love your comments
and new followers as well.