PhotobucketPhotobucketPhotobucketPhotobucket

Wednesday, May 30, 2012

Pretty from the start

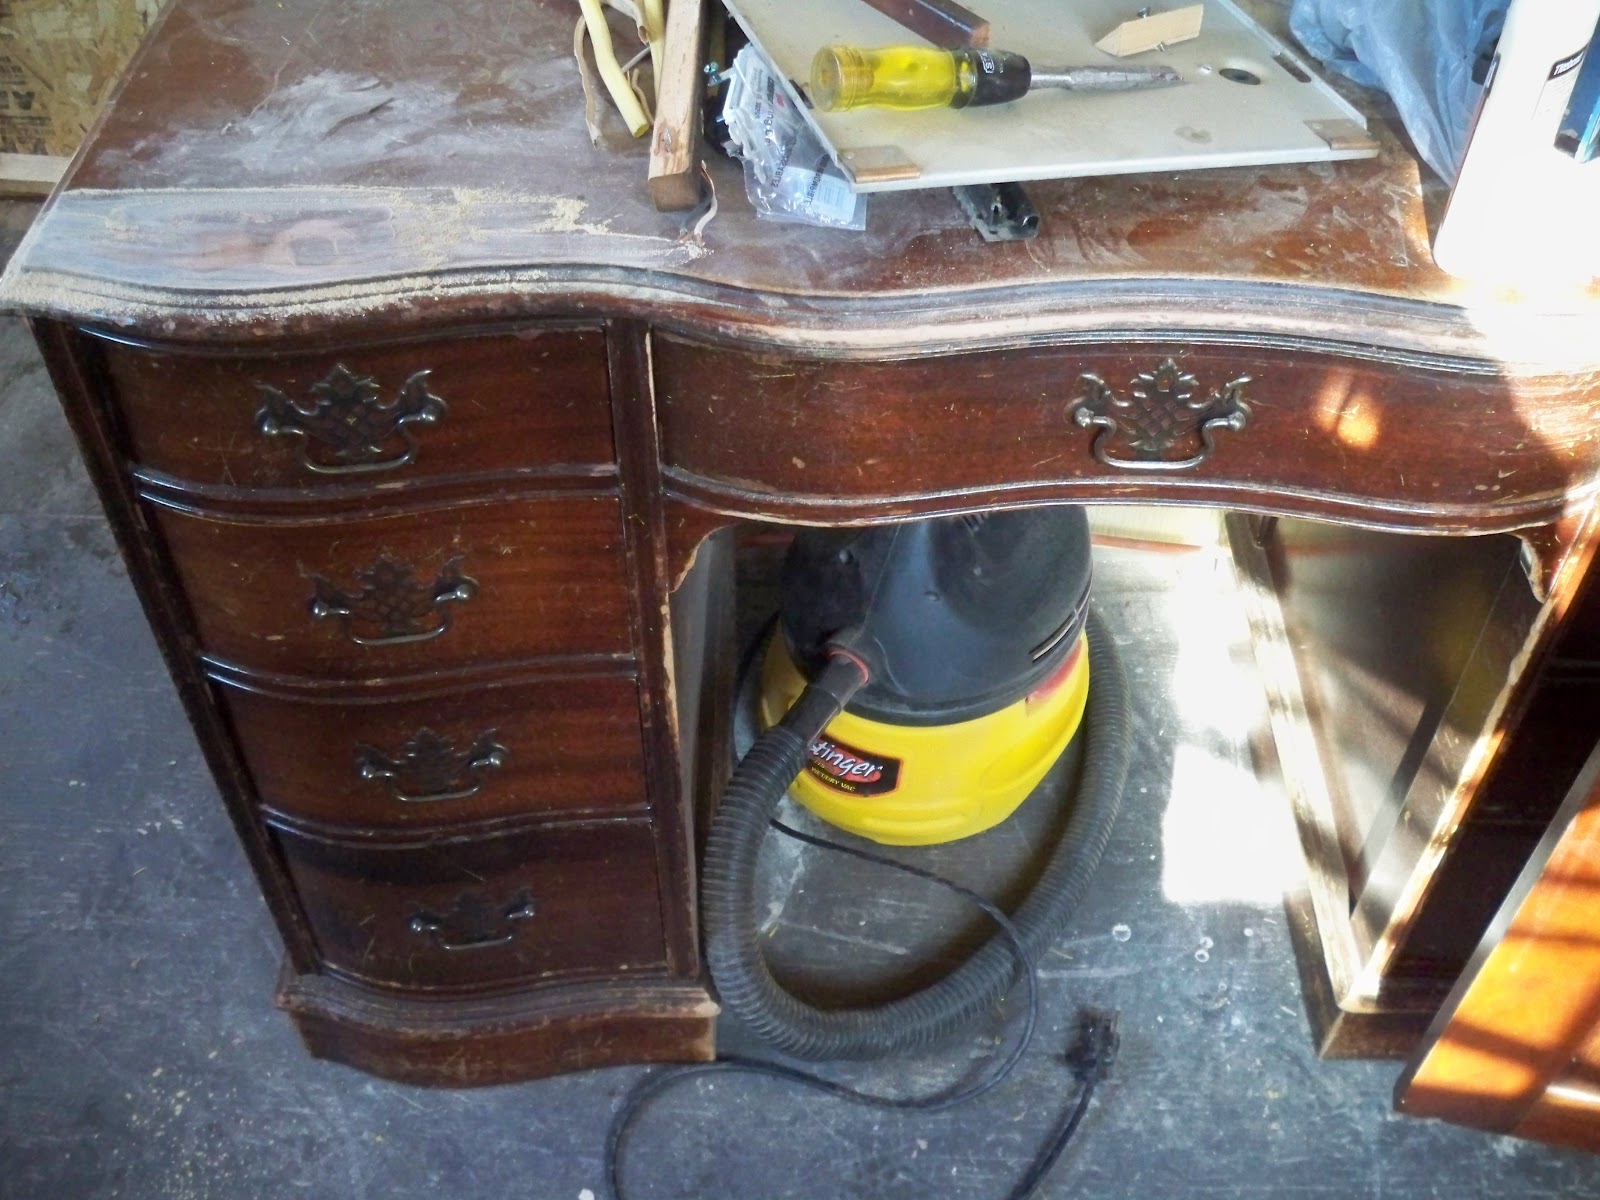
I found this beauty on Craigslist and was thrilled! To begin with I love serpentine furniture, and then to get it for such a good price too, score!  I know it's beautiful the way it is but if you could see it better you would see that there is lacquer dribbles all over it.  So guess what kind of paint I''m going to use.  Yip, chalk paint !


Picking the color for this piece was easy because I saw a beautiful buffet on Pinterest (of course) and I loved the color of it.  You can look at the buffet over at Paint In My Hair.  She does wonderful work.  The colors she used were ASCP graphite with a little french linen added to that.  I didn't have any french linen so I looked at another one of my favorite blogs, Altards, and Mandie has a conversion chart from chalk paint to latex.  Thanks so much Mandie for going to all that work.


ASCP graphite is really close in color to SW Tricorn.  French Linen is really close in color to SW Intellectual Gray.  I haven't used Sherwin Williams paint before but l really like it.  I love the sample quart size for six dollars!  Also I love that it has a screw on lid.  I mixed these colors 3 to 1 and then added my plaster of paris chalk paint recipe.  I loved how the color turned out.  I then used AS dark wax, the picture above shows the before and after using the wax.


 Usually I don't use wax because it's so much extra work compared to using poly.  I like to use wipe on poly acrylic or even spray on.  But I wanted the darkened look the wax gives it, and the sheen that you get with wax.  I took the hardware off and sprayed it Oil Bronzed, and that gave it the boost it needed.  


Here she is all done, it was so much fun doing this dresser, I guess because I knew the color was going to be beautiful from the start.  I didn't want to have to wait for an order of french linen to come, so this was the next best thing.  Hope you like it


The basket was given to me by my hubby so that when I needed to carry paint etc. from one place to another I would have something to pack it in.  I use the basket all the time for my supplies, I love it.


The drawers can be pushed in all the way like the bottom picture or even with the dresser like the above picture.  I like them even with the dresser the most and all my kids like it best like the bottom picture.  Which way do you like it?

.                                             

                Thank you so much for stopping by, I love your comments and new followers as well.
                                                                         Sandi
 

Wednesday, May 23, 2012

Lighten Up!

I found this cute buffet on Craigslist and scrambled to call for it first because I knew it would go fast.  And lucky me, I got it.   I left it black for the last couple of years, which I'm really not crazy about. For one thing you don't notice how cool the pulls are because everything is so dark.


The pulls are like giant brads.  You push the two metal parts through the dresser drawer hole and then separate the metal strips, just like a brad.


I painted the drawers a homemade off white chalk paint (Swiss Coffee) and the body is an "oops" paint I picked up.  I then used Val spar glaze to give it depth.  Then I sealed it with rub on poly.


Before


After


It's so much  lighter and prettier.  You can easily see the pulls and the wicker backing on the drawers.  I'm quit happy with it and use it daily to store DVD's in.

Thanks so much for stopping by, I love your comments and new follower's as well
Sandi


Wednesday, May 16, 2012

Who Scratches their Name in Wood?

I found this pretty desk at a second hand store and knew all it needed to restore it to it's beauty was some TLC. 


When I started sanding it I couldn't help but wonder, "who, and why, do people carve their names into furniture, really are they that bored"?  A cat had also done a real number on the base of the desk with it's claws.


Because of the deep engravings I had to sand really deep to smooth it out.


Once I did the wood on the top looked beautiful.  I stained it in ebony, my favorite stain color lately.


I then painted the rest in ASCP Paris Gray.  I love this color, and then I glazed it with Val spar glaze and finished off with spray on poly.


I love how it turned out, a face lift for a beautiful desk, and the fresh lilac's were the finishing touch.


Thank you for stopping by, I love your comments and new followers as well
Sandi


Tuesday, May 8, 2012

Was I blind, (yes I was)

Before I start my post can anyone tell me about blogger?  I lined all my pictures up and when I post it it doesn't line up right, and it changed my wall paper, which I can't seem to get back and I really don't like what's on it now, at all,  so frustrating!!!  Okay, okay, onto the post.

Do you guys remember a while back when I posted a dresser that had a huge crack down the middle of the top and down both sides?  Well when I bought that one I saw the crack and knew that I would be able to fix it with clamps and glue.  So I was at an  auction and I bid on this antique buffet because I loved how it looked and when I gave it the "once over", I didn't even notice the crack across the top and down both sides.  Not only was it separated, but it actually looked like it had fallen off a truck.  Every joint and all the molding was loose or had shifted terribly.  Take a look for yourself.


                                                                I know, totally blind


Really, how do you miss something like that?  I think I was so excited about the whole look of the buffet and that I had a chance to get it that I just didn't look close enough.  Anyway, because it was so cracked and all shifted I knew that it would be a two person job getting it back together again, and boy was it ever!
                                     

The top had to be taken off, then those two planks had to go through the table saw so they would match again.  Then the hubby made new dowel holes and put new dowels in it and glued it, clamped it, nailed it, and then set it aside to start work on the body.  We pretty much had to do that with the rest of it too.  We pulled out the pipe clamps and the brad nailer and a lot of glue and started a two day repair job.  Finally we were done with repairs and I could start the make over.  I stained the top in dark ebony because there was a liquid ink stain that had been spilt on it ages ago, it was too deep to sand off so I matched the stain with stain.


The wood is oak and wasn't very pretty, the back splash was a plain oak plywood so I decided to put an applique on it.  I stained it too so that when I distressed it it would have some dark color show through.


Thank goodness for wood filler, right?


So I decided to use ASCP Old White on the body and then glaze it.  Even though I sealed the whole thing before glazing so that it would glaze evenly, well it still didn't.  The back is where the plywood is at and as you can see the wood grain really stood out when I glazed it, and I didn't like it.  I loved how it made the applique look but not the rest of the back.


So what I had to do for about a week is leave it alone and look at it off and on.  It really grew on me too.  I now love it and am going to keep it.  I started out with the intention of selling this one but I am so attached to it and have the perfect place for it that it is offically mine.  Wasn't it worth all that work?


                         Thanks so much for stopping by I love your comments and followers as well.
                                                                         Sandi