


Now It's Your Chance to Win a Gift
At
Cutting Edge Stencils
Congratulations Jane, you are the winner!!!!
I will email you with the details.
Thanks to everyone for participating
(I did use the True Random Number system and eight was the first number that came up. I then tried to save it and got another number, sorry, its my first time at using it.)
I have had a fun opportunity to be contacted by a great company,
Cutting Edge Stencils,
and try out one of their stencils of my choice and review it.
My first thought was to stencil a pillow for my
bed. Then I thought about a benchI have and how cute it
would look with some stenciled fabric on it.
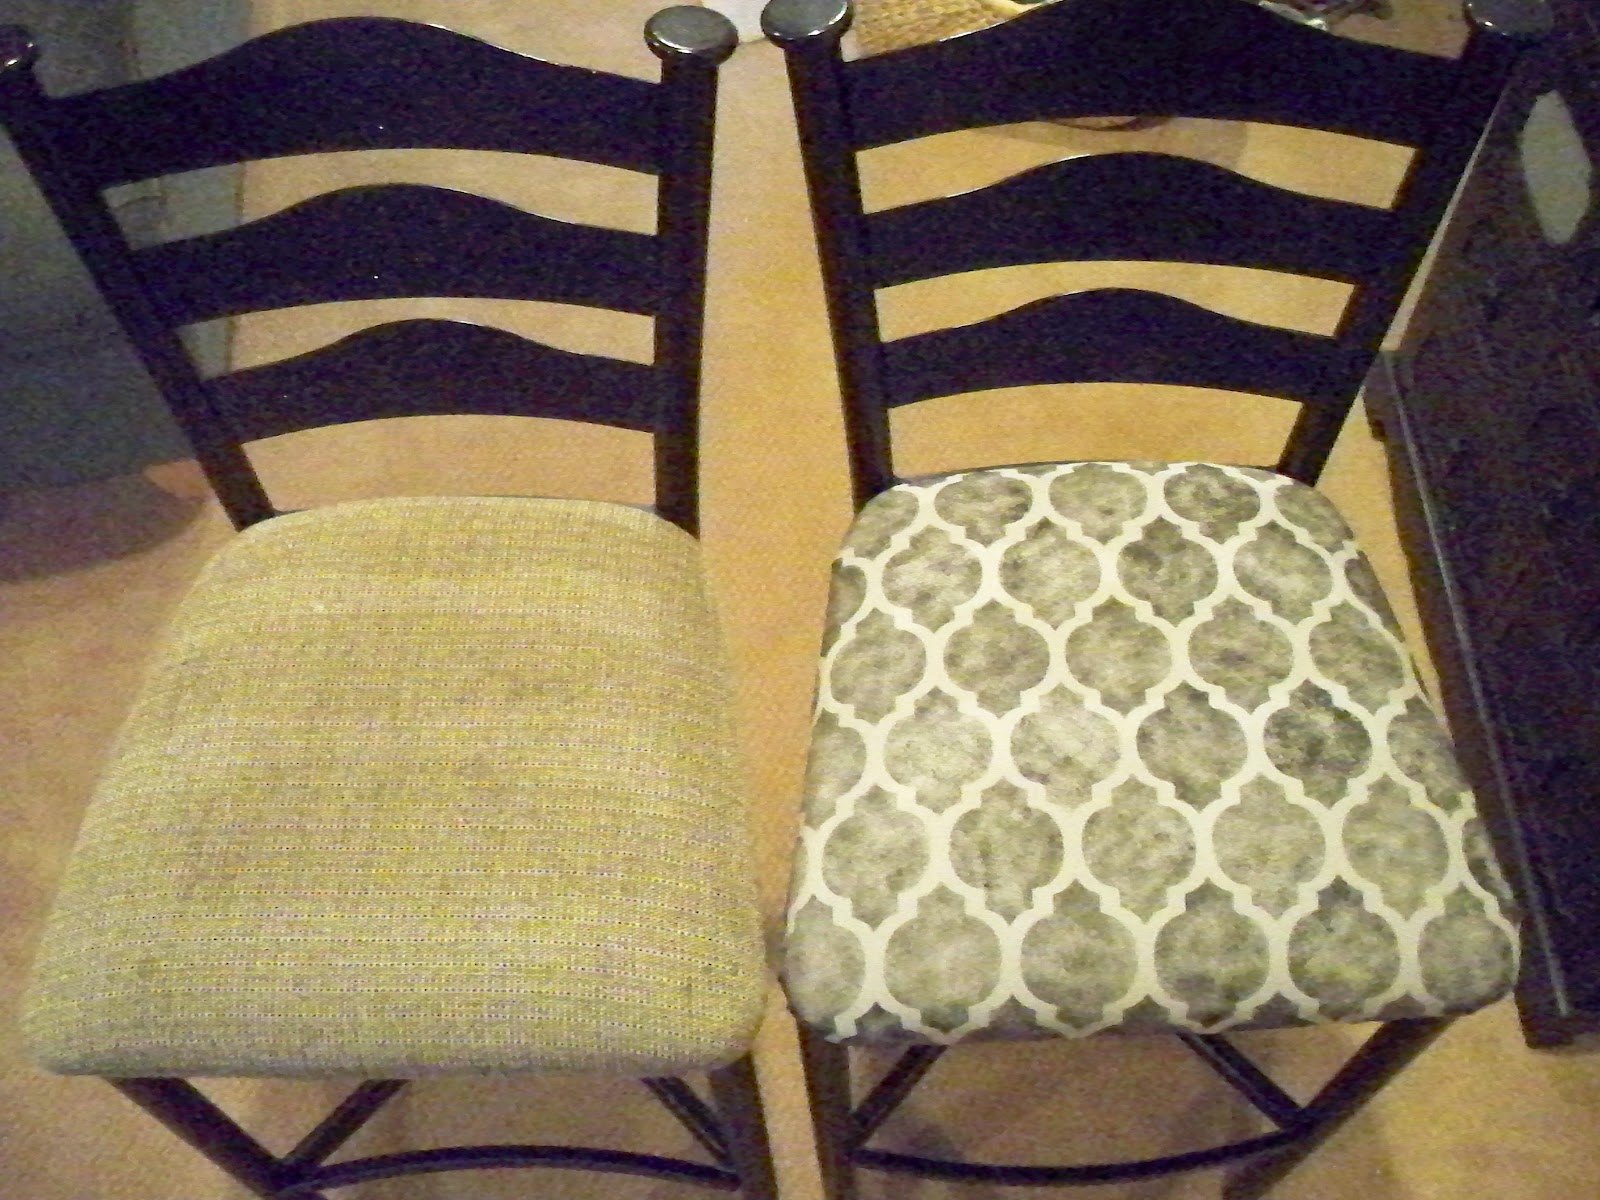
Finally it hit me,my bar stools!
Why hadn't I thought about it sooner?
The stencil I picked goes perfectly with these
stools. I love how they turned out, and until I can afford to get me some
beautiful wood one's, well these will do fine. Look at the before
and after picture's and how easy it
was for me to do this.

My Grandkids are usually the only one's who use these stools and their pretty neat kids,
I guess with time and bumps this is what you end up with.
No problem, I have some fun plans for them that includes stenciling.

I picked some gray fabric and since I already had black paint and the stools frames are
black, I knew they'd go well together. As you can see above, I used paint tape to
hold the stencil in place while I used the small brush to apply the paint

I decided to use the stipple brush and not roll it because I was a little nervous
about the paint seeping under the stencil.
I also wanted it to vary in it's shades of paint. First I put some paint on the brush and then I dabbed the end of the brush on the paper to get rid of most of the paint in the brush and then with your brush straight up(this is really important because if you lean your brush it will look stroked on instead of the finish you get from dabbing the material with your brush staight up).

The paint drys pretty fast and when it's completely dry you just over lap the stencil and keep on painting. So much easier
then I thought it would be.

Once I had a big enough piece done for both of the tops of the stools I started
to upholster them. I didn't even
remove the old fabric.

Here it is done. I really like how it turned out.
It completely changed the look of the stools.

I really had fun with this project, it's the first time
I have stenciled on fabric and
I loved it. It was fast and very inexpensive. Now it's your turn to get the stencil of your choice for free. Here's how you enter to win a stencil worth up to $50.00, and shipping is free, can't beat that with a stick, can you?
Become a follower of mine (thanks)
"like" them on facebook, here.
Rerurn to my blog and let me know that you "liked" them.
The contest will end Friday, Jan. 6th
and I will contact the winner.
Most importantly go to their website and check out all
their beautiful stencils. Go to the bottom of this page
and leave your comments, thanks so much.
Good Luck !
I am extending the give away until Monday because of the holidays last weekend
At this time of the year I enjoy going back over the pictures of the projects I've completed in the past twelve months. Some times it's hard to choose which one's are my favorites because for one reason or another I end up loving the one I'm working on. This year is no except to that, I've been fortunate to have found some really unique and inspiring pieces. So I guess the best I can do is share with you some redo's that brought me a great deal of happiness and one's that I learned so much from. I did this settee in the spring and it was one of those that was very hard to part with. Before  |
After
 | ||
This next one was my first ASCP project. I was so stressed out when I used her paint because I didn't want to waste a drop of it. Once I learned from all of you pros how to use it, I relaxed and enjoyed using it. Before
|


 After |
 |
This piece was a mess when I found it and after taking a longer look at it
I discovered that I was dealing with a plastic finish, click here for details.
I do love how it turned out and was so happy when a young mother bought it
for her little girl.

After


But my very favorite redo of the year has got to be my bedroom. I still go in there and smile every time because of how beautiful it turned out.
It was my first headboard redo, but not my last. I also made curtians, painted the
wall and refinished the end tables. I reupholstered the chair at a different time but it works well in here.
 |
| Before |
 |
| After |


I have done a lot of redo's this year and have learned so much from every one of them. I love what I do and get such great support from my hubby, who even made me a shop to encourage me in my
endeavors. I hope all of you have had a great year and I wish
you the very best this next year. I hope you have fun at what you do and take the
frustrations that you will have with some projects and apply what you have
learned to make the next project even better.
Have A Happy New Year!!!!!


